I added photos (images) to my page, but they are not showing up
When you add images to a page in the metadata tab, a school home page, a rich text block or a faculty detail page and the images do not show up after you publish the page or block, it usually means that the images are not published.
All images and docs added to the assets pane (images and docs folders) have to be published also.
How to publish missing images
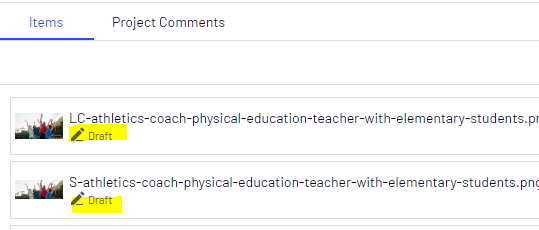
- To check if your images need to be published, click on Overview in your project (bottom left corner of editor).

- You should see the images that are missing in the list. They will be labeled as "Draft.
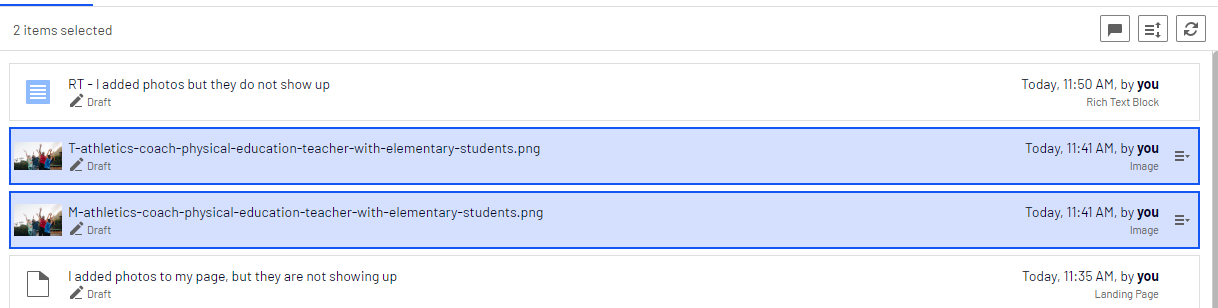
- Select the images you wish to publish by holding the CTRL or CMD key and selecting them by clicking with your mouse button.
- The images should highlight in blue.
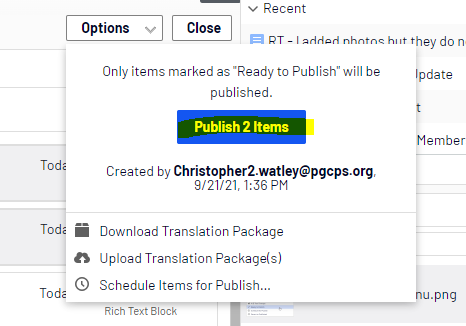
- On one of the images, go to the far right of its title and click on the Options menu that appears.
- Select "Mark as Ready to Publish"

- Click on the Options button at the top of the project and select "Publish # Items"
- The images should now be published. Refresh your published pages on your browser and they should now appear. You may need to do a CTRL+refresh or CMD+refresh on your browser to prompt the images to appear.
How to Use the Optimizely Project Overview to Publish Page Assets Including Images

Description:
There are different ways to publish content in Optimizely. One of the most efficient ways is to use the Project Overview. The Project Overview allows you to select as many items as you want and publish them all at once. It is also the best area to check for items you may have missed if you were publishing content as you were working. We recommend always checking the Project Overview before you are done editing.