Publishing Using the Project Overview

Images Not Showing?
Is a link to a document broken?
Optimizely allows you to create or upload content and then organize it on web pages to publish. Whether the content is created, like a new link card block or a rich text block, or uploaded, like an image or pdf document, all content needs to be published in order to be visible on your website.
How to Use the Optimizely Project Overview to Publish Page Assets Including Images

There are different ways to publish content in Optimizely. One of the most efficient ways is to use the Project Overview. The Project Overview allows you to select as many items as you want and publish them all at once. It is also the best area to check for items you may have missed if you were publishing content as you were working. We recommend always checking the Project Overview before you are done editing.
Working With Projects
Creating a project and adding content
You create a new project from the context menu on the project bar. When you create the project, it is automatically set as the active project. Note: refresh your browser and double check the project you created is active. To add a content item to the active project: make an editing change (such as creating a page, updating existing content, uploading an image and so on), and the content item is automatically associated with the project. You can also drag and drop items from the navigation or asset panes into the project overview to associate them with a project.
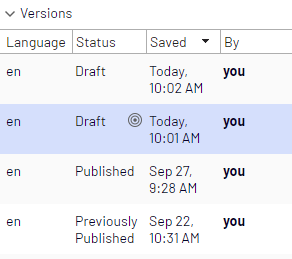
Adding previous versions of content
You have the ability to edit previous versions of content. This is especially useful if you created new unpublished content in the wrong project and need to associate the items with the correct “active project.” Note: If transferring items between projects, be sure to remove them from the “old” project.
- Customize the experience editor to add the Versions gadget.
- Double check you have the correct active project selected.
- Select and load the item into the editor.
- In the Versions gadget select and view previous versions of the content.
- Determine the version needed for further edits then make an editing change (update a property value.) The content item will be automatically associated with the active project.
Editing content in projects
You will see a notification if the version you are working on is associated with the active project.

Content not associated with the active project but with another project is locked for editing. However, even if that version is locked for editing, you still can create a new draft with the New Draft from Here button in the yellow toolbar. That draft is associated with the active project, or to no project at all if None (use primary drafts) is selected.
![]()
If you want to make a change that should not be associated with the active project, you have to select None (use primary drafts) or another project from the project bar. When None (use primary drafts) is selected in the project bar, you can create drafts, publish content and so on, as long as the content version is not associated with a project.
Content items that are part of a project remain so even after they are published.
Uploading media to projects
If you upload media (Images, PDFs, Docs, etc.) while a project is active, it is automatically associated with the active project. Note: If you have a project active when you upload a media file, you must manually publish the media file. Conversely, if you add/update a media asset while not working in an active project the asset is published immediately. Approvals are not set up for media assets.
How to preview content
Collaborating on projects
You can add comments on project items in the project overview and, for example, ask other editors to review an item. This feature is described in Commenting
Publishing project items
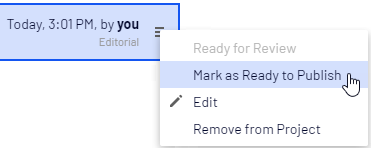
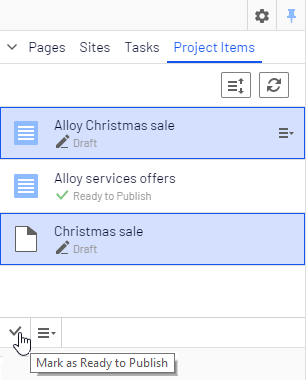
From the project overview, you can publish multiple items that are set to status Ready to Publish. You can set items to Ready to Publish from the publishing menu while editing an item, from the context menu in project overview, or from the Project Items navigation pane. You can select multiple items and set them to Ready to Publish, both from the overview and the navigation pane. You publish the content items associated with the project, not the project itself.
How to Use the Optimizely Project Overview to Publish Page Assets Including Images
There are different ways to publish content in Optimizely. One of the most efficient ways is to use the Project Overview. The Project Overview allows you to select as many items as you want and publish them all at once. It is also the best area to check for items you may have missed if you were publishing content as you were working. We recommend always checking the Project Overview before you are done editing.
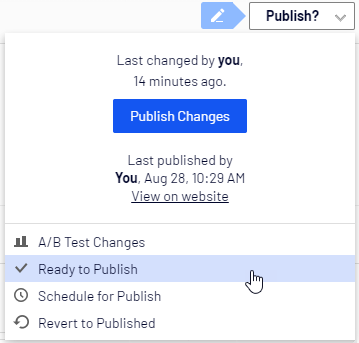
When items are ready for publishing, you can publish them directly from Options, if you have publishing access rights, or schedule the project to be published later.
Note: If the items in a project were scheduled for publishing and you add new items to the project, the new content is not scheduled for publishing automatically. You must specifically set the new content to scheduled time of publishing if you want it to be published at the same time as the other items in the project.
If you need to edit content that is scheduled, select Remove Scheduling and Edit, edit the content and reschedule. You can continue working with a project after it is published.
Clean-Up & Removing project items
Clear the clutter! Having published items not currently associated with the work you're doing can make the project interface confusing and overbearing. After you’ve published project items it’s a good idea to remove them from the project.
Note: If working in a project with translation approvals, you can remove Spanish items as well, just be sure the item has been published. Editors in each language have the ability to remove all project items.
Removing Content
Remove a content item from a project by selecting the item in the project overview or from the project items navigation pane and then selecting Remove from Project from the item's context menu. Removing a content item from a project means that it is no longer associated with the project but it is not deleted from the website.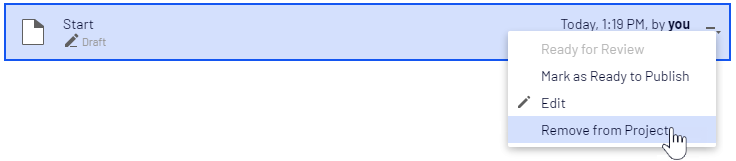
Deleting Projects
Delete a project by selecting the project in the project bar and then select Delete Project from the context menu. Associated content items are not deleted but are no longer associated with a project. You cannot recover deleted projects. When deleting a project with items scheduled for publishing, you can keep or remove the scheduling for each item.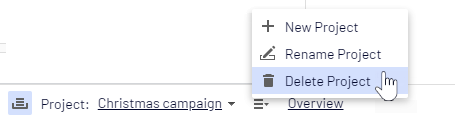
Note: DO NOT DELETE projects associated with approvals, doing so would wipe out the comments history of collaboration between editors. If you have any questions email websupport@pgcps.org