Learn more: Think First, Edit Later
Create Pages & Blocks and Using Pages & Blocks
Plan: Think About First
- Should I Edit inside a Project?
- Determine which blocks & pages you want; see: Blocks and Containers & Detailed Page List
- Am I the owner of this information?
- If not, do I have a thorough understanding of our Shared Resources?
- Determine which parts of the page should be grouped together; these will be accordions, background containers, tab blocks or rich text blocks containing other blocks; see: Advanced Use of Blocks.
- Will I need to use media (documents, slides, video, images) files? See naming convention
- Is this page being created to use as a Partial Page View or Partial Page View (Supportive Page)?
Create a Page
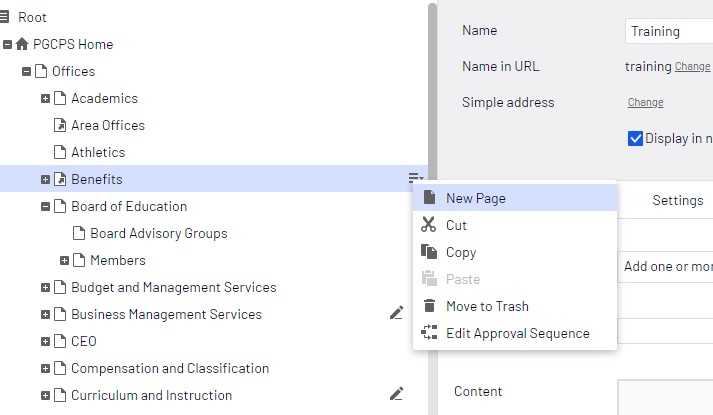
- Open the left page navigation pane.
- Choose an existing page to be the parent of your new page. Typically this is your Office or School Homepage.
- Click the options menu at the right side of the parent page.
- Click New Page.
- Select a Page type; See:What is an Office Page or What is a School Page & Detailed Page List
- Enter a Page name.
- Enter values for page properties. For the metadata > Thumbnail Image property, we recommend dragging in a image from our shared images folder. Note: Understanding Page Defaults for all page capabilities.
Create Blocks
- Create the blocks and containers in the Blocks and Media (Asset) pane in your office/school blocks folder; see Getting Around the Experience Editor & Managing Blocks
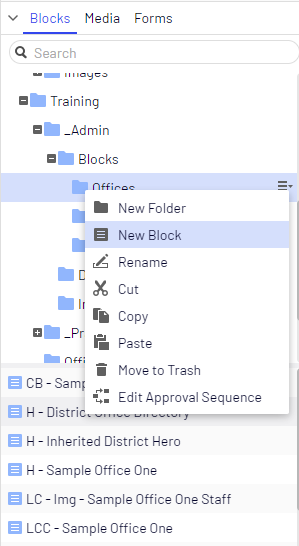
- Open the right content asset pane
- Be sure the Blocks Tab is selected
- Click on the blocks folder under your office or school name
- Click on the context menu

- Click New Block
- Title the block (view naming convention)
- Select the block type
- Fill in the properties of the block (see block type details)
- Click Publish or Submit for Review if Approvals were applied
- Repeat for as many blocks as you need for your page.
How To: Use Pages & Blocks
Using Pages
There are two ways to use pages: as Partial Page Views and Hyperlinks.
Partial Page View (PPV)
PPV's are the "card" like display of Optimizely pages when used inside content drop zones on page templates or Background Container blocks.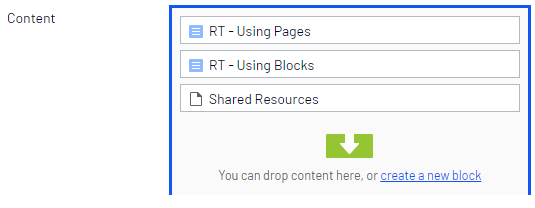
Note: Use Display Options to adjust the PPV display width.
Hyperlink
Pages Dragged & Dropped into rich text properties, link properties and blocks (Rich Text, Accordion Item, Tab Child Block) become hyperlinks. The hyperlink text defaults to the Optimizely page name. Once the hyperlink is dropped, editors may select the hyperlink to edit the link text and add formatting options.
Using Blocks
There are specific use for Optimizely blocks. The block type determines how and where it can be used. The main idea editors should keep in mind when creating & using blocks is to maintain one central place to update important information. For example: Contact Block, create one CB, then add the block to the pages you want to share contact information. In the event you need to add new contact information, you only update the block itself, not each page.
Add Blocks to a Page
- Click on your page in the left page navigation pane to load it into the Experience Editor
- Drag the blocks from the right content asset pane (or from the Recent gadget if content was recently viewed) onto your page Content drop zone property.
- Change display options to create columns; see Create Columns Through Display Options. Default is full width.
Add Blocks to a Block
- This applies to the Tab, Accordion and Background Container Blocks
- See: Advanced Use of Blocks for the advanced capabilities of blocks with rich text fields
- Double click on your block in the right page asset pane or single click if block is in your Recent gadget to load content to your editor
- Drag the blocks from the right content asset pane (or from the Recent gadget if content was recently viewed) onto your block.
- For the background container block: Change display options to create columns; see Create Columns Through Display Options
Learn how to preview your blocks and pages
Publish, Send for Review or Schedule
Now that you've created pages and blocks and used them somewhere, you must now complete the workflow process:
Publishing
Published content is instantly available to the public, it will be live in search immediately.
Schedule
Review: Schedule and Archive